You've come to a good place if you have ever wondered how to finish doors and windows. There are many steps involved with finishing trim. You will learn how to properly install your trim. After you've mastered these steps, you can start applying the trim yourself! These are some tips to help you make the process as smooth as possible. Whether you're working on a DIY project or tackling a professional one, you'll be well on your way to a beautifully finished door or window.
Techniques
You don't have to be a professional, but you should know how to finish trim. These tips will help you finish your project quickly and easily. Avoiding common mistakes when trimming is important. Here are some ways to avoid making common mistakes when trimming. These techniques can save you time and prevent headaches.

Tools
Sharp pencils are essential tools in any carpentry endeavor. A good pencil is worth the price of its gold when trimming. One third of an ind can make the difference between a good and perfect installation. You need to keep your pencil sharp, so make sure you buy enough trim to complete your project. These are 10 essential tools to use when trimming trim. These tools will make your job easier! Keep in mind that the sharper your pencil is, so the installation of trim will go more smoothly.
Materials
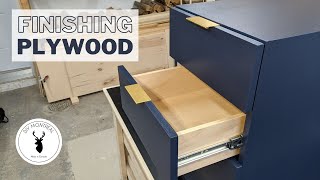
There are many different types of materials for finishing trim, including wood and synthetic materials. Some types are made of plaster and other materials, while others are manufactured out of plastic. Trim can also be called casing or molding. This article will describe the various types and techniques of trimming. Be sure to match the decor of your room before choosing trim material. In some cases, it may be best to experiment with different materials to determine which will best suit your home's style and color.
Preparation
You need to be aware of several things when you are painting. The preparation of your project will not only affect its final outcome, but it can also impact the flow of the project. Make sure you gather all the supplies you'll need and store them in an accessible location. After gathering all necessary supplies, clean them well before starting the process. Here are some tips to properly prepare trim. After cleaning your trim, apply the final coat.
How to choose a finish
There are three options of paint for wood trim: semigloss, high gloss, or satin. Each gives off a different look. The color of the trim and overall design of your house will influence which paint finish you choose. These tips will help you choose the perfect paint finish for your house. Below are the main paint finishes that wood trim can be used to help you choose the right paint finish. We'll be discussing each finish in detail below.
FAQ
What is the difference of plywood and particleboard?
Plywood is made up of layers of wood pressed together under pressure. Plywood comes with a range of thicknesses, and it is most commonly used for flooring and cabinets. Particle board can be made from sawdust, resin, and then compressed to make large blocks. It's often used for home renovation projects. Both types of boards are durable and easy to cut.
How can I learn basic skills in woodworking?
The best way to learn how furniture construction is to make your own bench. This project can be completed with whatever wood you have available at home. If you are unsure what type of wood is best, you can get cheap pine boards at Lowes (or Home Depot) instead. After you've constructed your bench you'll want sand all the rough edges off and varnish it.
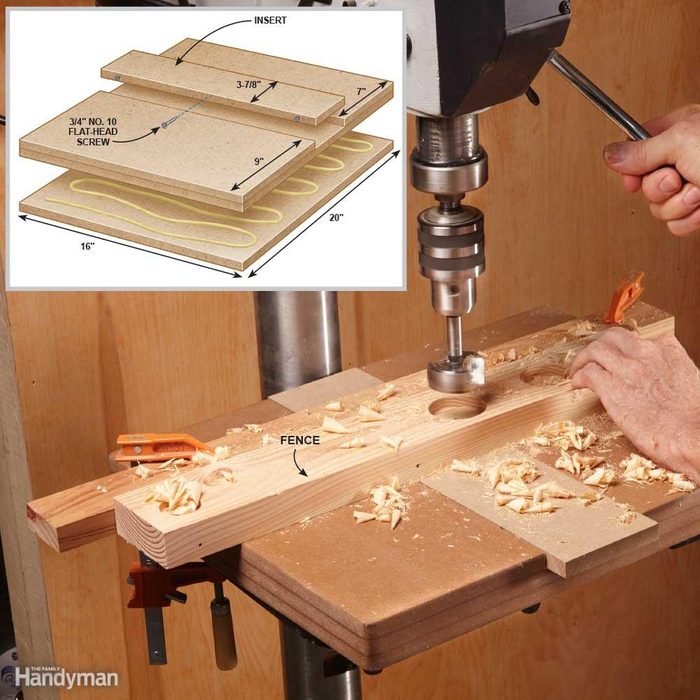
What kind tools do carpenters use to build?
Carpenters use a hammer as their most common tool. A hammer is used for pounding nails into wood. A hammer is used to hold pieces together during a project. Other tools include clamps, pliers, screwdrivers, measuring tape, pencils, saws, drills, and wrenches.
Do you know anything more about woodworking?
It is easy to underestimate how much work it takes to make furniture. Finding the right type of wood is the most difficult aspect of this process. There are so many options for wood, it can be difficult choosing the right one.
Another problem is that not all wood has uniform properties. Wooden can split or crack, while some woods may warp. These things should be considered before you buy wood.
Where do I get my woodworking supplies?
There are many places you can get everything you need, and you don't have to go far. You could also visit hardware stores in your area or shop online at Amazon.com.
You might also consider flea markets and garage sale for any old furniture or other materials you could reuse.
How do I organize my shop?
First, make sure you have a designated space for tools storage. You want your tools to stay clean and free from debris and dust. Use pegboard hooks to hang tools and accessories.
Is it possible to open my own woodworking shop?
It is not easy to start a woodworking business. There are lots of legal requirements and regulations that you'll need to follow. This doesn't necessarily mean that you should go through all the work of setting up a company. Many people choose to join existing businesses. This way, you only need to pay membership fees and taxes.
Statistics
- In 2014, there were just over 237,000 jobs for all woodworkers, with other wood product manufacturing employing 23 percent; wood kitchen cabinets and countertop manufacturing employing 21 percent. (theartcareerproject.com)
- Average lumber prices rose about 600 percent between April 2020 and May 2021. (familyhandyman.com)
- Woodworkers on the lower end of that spectrum, the bottom 10% to be exact, make roughly $24,000 a year, while the top 10% makes $108,000. (zippia.com)
- The U.S. Bureau of Labor Statistics (BLS) estimates that the number of jobs for woodworkers will decline by 4% between 2019 and 2029. (indeed.com)
External Links
How To
How to stain wooden surfaces
The process of staining wood involves the application of chemicals to the wood's surface, which causes it to change its color. This chemical reaction causes wood to turn from whiteish to brownish. Oak is the most commonly used wood for staining, but other woods can also be stained.
There are many methods to apply stain to wood surfaces. You can mix the stain with a solvent, such as turpentine, and spray it onto the wood. Others use a solution made up of water and dye, which is then applied directly onto the wood. The stain can be mixed with paints and varnishes to become part of the final coating.
Preparing the surface for staining wood is the first step. You must clean the wood well to remove any grease or dirt that might interfere with the application of the stain. Sanding smoothens scratches and rough spots. Then you must decide what kind of stain you want to use. There are two main kinds of stains available: non-penetrating stains and penetrating. Penetrating stain penetrates deeper into wood than nonpenetrating, making them suitable for dark colors like mahogany. Non-penetrating stains work best with light colors like maple.
After deciding on the type of stain, you want to apply, prepare your tools. Because you can spread the stain evenly with a paintbrush, it is ideal for applying them. It is a good idea to have rags on hand in case you need them to clean up any stains that may remain after you have finished painting. If you are planning to mix your stain, ensure you have enough containers for each component.
Once you have prepared all your materials, it is time to clean the areas where you will stain the wood. Use soap and warm water to remove dust and grime. Use a dampened rag and clean water to wipe the furniture. Make sure you eliminate any loose debris, especially if you plan to stain darker wood.
Apply the stain next. Begin at one end and spray or brush the stain on the wood. Slowly and carefully work your way along the grain to reach the opposite end. You must be careful not to allow the stain to drip off the wood's edges. Allow the stain to dry completely before you move on to the next step.
Apply a clear polyurethane sealant to protect the painted surface. Three coats of polyurethane sealing agent are required. Allow the third coat, which should dry overnight, to dry before sanding.