
Whether you're carving a piece of furniture or an animal head, seasoning your wood is an important step in creating a safe and effective piece of artwork. Wood is most easy to carve when it’s still green and supple. Drying can prove challenging if the grain spirals or is interlocked. Once you have seasoned the wood, you can apply shellac or paraffin wax to keep it flexible while you carve.
Carve green wood easily
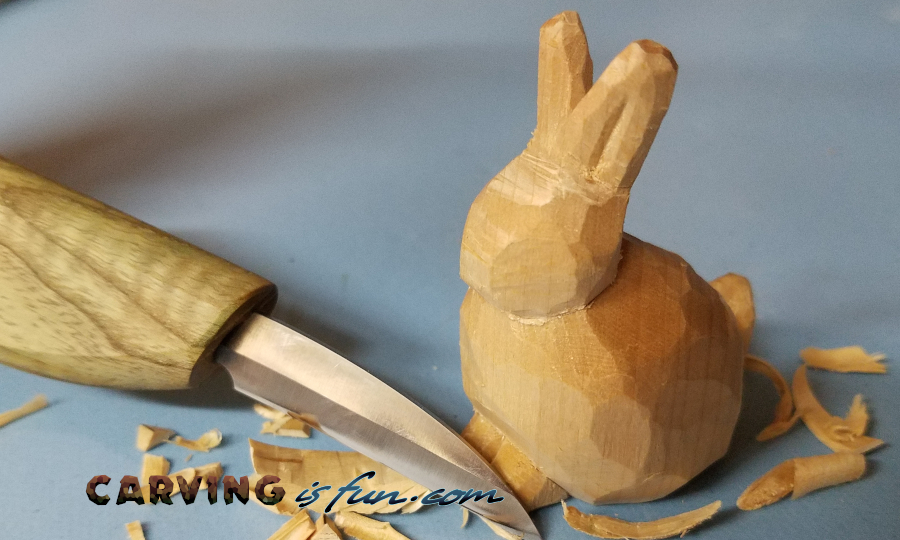
If you are looking for a piece wood to carve, then green wood is the best choice. Because of its softness and moisture, it is easier to carve than any other woods. It's ideal for carving bowls, spoons, and other bowl-shaped items. The wood is soft but can split if it's not dried quickly enough. If you want to avoid splitting, look for branches that are less susceptible to breaking as they age.
Freshly cut green wood should be sealed properly to prevent cracking and rotting. To seal the wood, use a commercial wood sealant such as ANCHORSEAL. Leave the wood piece for at least 2 weeks after applying the sealant. This will preserve it from the outside elements and keep it new. Remember that green wood is less dense than dried wood. Therefore, you may have to make repairs to prevent cracking.
Dry wood is harder to carve
You need to use special tools when carving dry wood. Wood bought in stores usually has a moisture level between 10 and 20 percent. However, commercial wood manufacturers dry wood faster than it can naturally dry. Therefore, wood purchased for carving will often be green or still green. It is generally easier for green wood to carve than for dry wood.

It becomes more difficult for wood to carve as its moisture content decreases. This causes the blade to dull quicker. It is also less likely for the tool to be damaged if it is accidentally struck. This makes it more difficult to maintain. It's best to purchase green wood from a trusted store. Green wood can be stored in a reputable store to save money and reduce the hassle.
Drying problems can be caused by interlocked or spiral grain
Unlike traditional hardwoods, which can dry quickly, seasoning wood for carving with spiral or interlocked-grain causes some drying problems. This wood tends to warp more easily than other types and is therefore more fragile than others. To prevent this, it's important to store it in a cool, dry place. The best wood for carving is a medium-density hardwood, such as maple.
Red oak is a good choice for carving as its heartwood, which is light to deep red and has a faint purple tint, is excellent. It has a fine texture with a slight gloss and a little luster. Red oak has a low odor, and its air-dry density is about 25 to 40 pcf. Its Janka side hardness is 570 to 665 lb for dry material and 210 to 218 in.-lb for green wood.
Applying paraffin wax and shellac to wood before carving
You should seal your wood after removing any bark. Shellac and paraffin wax are both options. Apply the oil around the ends and extend five to ten mm beyond the end grain. It will provide protection and durability. It is important to apply three to four coats of sealer to the wood you are using for carving.
Before applying shellac, sand the wood surface with finer sandpaper. This will make the surface smooth and free of any ridges. It will be much easier to sand your piece after the shellac has dried. You can achieve the best results by applying three to four layers shellac to your wood. Use 400-grit sandpaper if the wood has a rough finish. The final coat will be applied primarily for its appearance and functionality.
Avoiding knots
You must season wood before carving animals, sticks, or other objects. Seasoning is the process of drying out the moisture in wood. Modern methods make it possible to season wood in a matter of weeks. But, it is still important to avoid wood with large knots. These knots can lead to cracking and warping later.
Before you start, it is a good idea to test the wood. For carving spoons, green wood is best. You can also borrow it from family and friends. It's best to choose wood that is at least three times the thickness as the spoon you're carving. You can also find green wood, but be sure to choose a piece that's not too hard. You will then be able season harder wood as you get more familiar.
FAQ
How do I organize my shop?
To keep your workshop tidy and organized, you should first create a place for tools storage. To keep your tools sharp and ready for work, keep them clean of dust and debris. To hang accessories and tools, use pegboard hooks.
Can I make a living doing this?
Yes! In fact, many woodworkers already do. According to the U.S. Bureau of Labor Statistics in May 2012, the median annual income for woodworkers was $34,000 That's higher than the national average of $31,000 per year.
What is the minimum amount I will need to start?
There are no exact numbers because every project is different. These are the factors that will give you an idea of how much you'll need.
-
Materials cost
-
Tools and equipment
-
Time spent on the Project
-
Hourly rate
-
How much profit do you expect to earn
-
Whether you plan to hire help
You might start small if you are just starting out. As you gain more experience, you will be able tackle more complicated projects.
What wood items do well?
Wood that has been harvested sustainably is the best-selling type of wood.
Maple, cherry, mahogany walnut, teak, mahogany and maple are the most common woods for furniture.
These woods are very strong, but they also have beautiful grain patterns and colors. If they are well cared for, they can last many years.
To protect wood furniture from moisture damage, it should be painted first. This applies to all surfaces including drawers, doors, handles, and handles.
Paint that is water-resistant will ensure furniture lasts for a long time.
You should use a high-quality oil-based primer followed by two coats of top coat. Depending on the amount of wear, you may need several coats.
Avoid spray cans and aerosol paints. These products are contaminated with solvents, which evaporate rapidly and can leave behind toxic fumes.
How do I determine what kind of wood my project is made from?
Always verify the label on wood purchases. The label should contain information about the wood species, its moisture content, and whether it has been treated with preservatives.
Statistics
- In 2014, there were just over 237,000 jobs for all woodworkers, with other wood product manufacturing employing 23 percent; wood kitchen cabinets and countertop manufacturing employing 21 percent. (theartcareerproject.com)
- Woodworkers on the lower end of that spectrum, the bottom 10% to be exact, make roughly $24,000 a year, while the top 10% makes $108,000. (zippia.com)
- The best-paid 10 percent make $76,000, while the lowest-paid 10 percent make $34,000. (zippia.com)
- Most woodworkers agree that lumber moisture needs to be under 10% for building furniture. (woodandshop.com)
External Links
How To
How to properly use a handsaw
The wood is cut into pieces using a hand saw. Most common hand saws include circular saws (jigsaws), table saws and band saws. A handsaw is a tool made of metal or plastic that cuts material like wood, plastics, metals and others.
Hand saws have the main advantage of cutting at precise angles without needing to adjust the blade. It's also much easier to sharpen them than power tools. However, there are some disadvantages as well. For example, they are heavy and bulky, so you must be careful when transporting them. If you are not familiar with how to use one you may injure yourself.
You can hold a handsaw in many ways. While cutting, keep your fingers away from the blades. If you don't, you might get hurt. To hold the saw properly, your thumb should be in contact with the blade. This will ensure that you don't accidentally touch or scratch the blade.
When using a hand saw, you should never put anything under the piece of wood you're cutting. This could cause the blade to slip from the wood's surface. Before you begin cutting, make sure to inspect the area. Make sure no nails or screws are hidden beneath the wood.
While working with a saw, you should always use safety goggles. These glasses prevent dust from entering your eyes and make it easier for you to see what's happening. Safety glasses also protect your eyes from flying debris.
First, learn how to safely use a hand saw. Practice until you feel comfortable cutting. You'll soon be able to cut any item once you have mastered the basics.