
A trimming router, a mini router that can be used in various tasks such as edge trimming, is called a trimming router. These devices can also be used to drill holes or to create signs. These devices may not accept bits that are smaller in size than the baseplate. In these situations, a smaller router bit might not be practical. This article will cover the many uses of a trimming router. You will be able choose the right router for you if you have read this article.
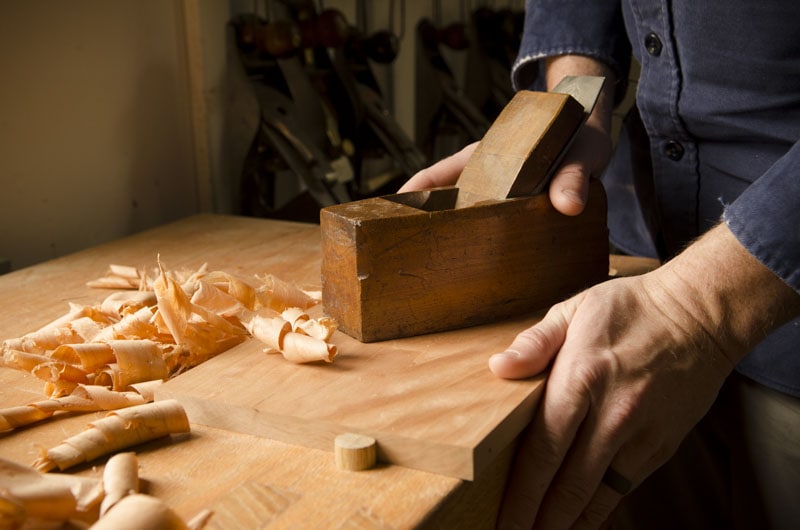
Trim routers can be used as miniature versions of regular routers
There are two types - straight and plumb. Both are suitable for light-duty jobs, but straight routers can be more difficult to use than plunge routers. Plunge routers require two hands to operate and are heavier than trim routings. The motor of the plunge router is strong enough to withstand heavier materials. The plunge router's motor is larger and more powerful than trim routers. A plunge router is also harder to maneuver than a trim router, which is why plunge routers are often more expensive.
They can handle a small profile bit for edge trimming
The two most common types of trim bits are single rounding over and double rounding over. Double rounding over bits creates a smaller profile. Single rounding over bits cuts the top and bottom edges simultaneously. The project's finish is preserved by single rounding, while double-rounding creates a decorative edge. Double rounding is less expensive than single rounding. However, you should make sure that you are choosing the right one for what you need.
These can be used for drilling holes
Trimming routers have a small footprint, making them ideal for small box sides and narrow aprons. The router comes with a cutting edge and a solid-carbide bit for polishing. They can also drill holes. A template is a simple way to drill a hole into a veneer surface. If you don't have any template, you can insert the routers 1/4-inch-up-cutting spiral knife.
They can be used as signs
You can create your own signage using many different materials. Different types of paper can be used to create your signage. For example, you can use glossy photo paper to create a sign with a professional look. Photo paper is a flexible material that can be used in a variety of ways. You can stick this material to many surfaces. It's also easy to use for signage. However, you need to be careful about the type of material that you choose, as it tends to warp if exposed to harsh temperatures.
They can also be used to make mortises
If you have a woodworking router, you may be interested in using one for mortises. This tool comes with many functions. It can make mortises or tenons. With this tool, you can make any shape that you like by using a template. For instance, furniture can have inverted "D" shapes at the top, bottom and top. You can create a straight line at the top and short curves on the ends of the "D".
They can be used in groove-making
Routers are handheld machines that use a bit to cut grooves. Different types of router bits can be used for different purposes. They are useful for cutting straight grooves or decorative V-grooves. Router bits can be purchased separately or in sets at hardware stores. The menu at the top allows users to choose from the various options. Here are some common ways to operate a router.

These can be used for chamfers
Chamfers create beveled surfaces by adding or subtracting flat sections along the edges of shapes. This process is applied to either a single edge or multiple edges. Select an edge that you wish to chamfer. Next, determine the offset distance. You can then specify the distance and angle between them. SolidFace allows you to chamfer edges by pointing at a straight line or reference point. Before you begin to machine the part, you can view the chamfer created.
They can be used to trim laminate edges
You can use PVA glue or a suitable contact adhesive to trim the edges of the laminate board. You can remove old glue residue with rubbing alcohol, or a damp paper towel. Then, apply the new glue to the laminate board using long, smooth strokes. Allow the glue to dry for twenty minutes before it forms beads. Next, lift the laminate carefully onto its new location. If necessary, repeat the process. Make sure you use the same amount glue for the back and the edge.
FAQ
How much should a Woodworker Charge per Hour?
The hourly rate paid to a professional woodworker is dependent on many factors. These include skill level, availability, and location.
A skilled woodworker can expect an hourly rate of $20-50.
An hourly rate of $10 for a less skilled woodworker could be possible.
Where can I buy woodworking supplies?
There are plenty of places where you can find everything you need to start out. For example, you could visit local hardware stores or look online at websites like Amazon.com.
You can also check garage sales and flea markets for old furniture and other materials you can reuse.
What tools are best to begin with when I become a woodworker
Woodworking requires patience and practice. It takes time for you to master the different techniques and tools that are required to woodwork.
There are many options for woodworking equipment today. Some prefer to use power tools, while others prefer to use hand tools.
The choice is yours, but you must ensure you choose the right tool for the job. A basic set of hand tools may be enough for you if your skills are not yet developed.
A router is a tool that cuts intricate shapes in wood. You can also learn how to use it. These tools can be purchased at most hardware stores.
How do you calculate woodworking prices?
The most important thing to remember when calculating costs for any project is to keep them as low as possible. You should always try to make sure that you are getting the best deal on materials. You should also consider other factors that could impact the cost of your project, such as experience, skill level, time, and money. Check out our guide on the average cost of common DIY projects to get an idea of how much you can spend on woodwork projects.
How do I identify the type of wood that I am dealing with?
Always verify the label on wood purchases. It should have information about the wood species as well its moisture content and whether any preservatives were used.
What material would your recommendation be to learn woodworking?
Start off with softwood like pine and poplar. After you are comfortable with the softwoods, move to hardwood.
Statistics
- Average lumber prices rose about 600 percent between April 2020 and May 2021. (familyhandyman.com)
- Overall employment of woodworkers is projected to grow 8 percent from 2020 to 2030, about as fast as the average for all occupations. (bls.gov)
- Most woodworkers agree that lumber moisture needs to be under 10% for building furniture. (woodandshop.com)
- The U.S. Bureau of Labor Statistics (BLS) estimates that the number of jobs for woodworkers will decline by 4% between 2019 and 2029. (indeed.com)
External Links
How To
Tips for driving a nail in wood
First, choose the right size and type of tool to drive a nail through wood. The most common types of hammers are claw hammers, sledgehammers, mallets, ball peen hammers, and hatchets. Each type of hammer has its pros and cons. A clawhammer works best when hitting something hard like nails. However, it can sometimes be difficult to see exactly where the strike is going. A sledgehammer is great for hitting large areas at once, but it's too heavy to use effectively for smaller tasks.
Place your hand flat on the side of your chosen hammer so that the handle rests in your palm. You can grip the handle with your fingers, but not so tight that it causes injury. The hammer should be held straight up with your wrist relaxed. Then swing the hammer back toward the ground, aiming for the center of the nail. You should feel the impact of the hammer striking the nail. Try practicing with a block to help you master the art of swinging a stick.
When you're ready to start driving the nail, hold the hammer in front of you close to your body. The nail should be perpendicular to wood's surface. Your eyes should be focused on the nail's tip. Swing the hammer forward, and then move the hammerhead. You can repeat this several times, increasing your swing speed. Once you've mastered the technique, try adding power to your swings. Try holding the hammer above your shoulder and bring it down forcefully. You will be able to use more energy and put your best foot forward.
Once you've nailed the first hole, remove the hammer from the nail. The rest of the nails can be pulled out using a screwdriver, pry bar, or a hammer. To prevent splitting the wood, ensure you keep the nail heads flush against the board's surface.