If you've ever wanted to create wood carved caricatures, you've come to the right place. You will learn all about the design and safety. A standard caricature can be transformed into a masterpiece. For those who are unsure where to start, here are some ideas to make your caricature truly unique. You can also take classes with caricaturists.
Techniques
Wood carving caricatures offer a unique way to create sculpture. They can be amusing and tell a story without using words. Caricature depicts a cartoonized version of a real person. Dave Stetson, wood carving carvers, has a strict code that ensures realistic representations of real people. They also have specific rules that must be followed in order to create effective caricatures. This article will explain the basics of caricature creation and offer tips on how to create one.
First, the technique to carve an astronaut requires focus. Carving an astronaut requires using spoon carving knives or whittling knives, which are both delicate tools. To make the job easier, you can use templates while you are carving the astronaut. A tutorial will give you step-by-step instructions for how to complete your caricature. If you're working on a budget, you might want to look into buying a tutorial for this specific subject.
Designs
Amusing wood-carved caricatures can be made in many ways. An excellent way to begin is by using a template. You can also purchase a cardboard cutout and use the same patterns for carving different types of caricatures. A tutorial on caricature carving can be followed. This article will introduce you to some of the best designs and techniques of carving a caricature.
The first caricature that Fred made was called 'Aristocrats of the Roads'. It depicted two men wandering. It was made out of Honduras Mahogany. Fred entered it in competitions, winning several awards. He also featured it in the Chipping Away Catalog. Fred created a second Luciano Pavarotti caricature in 2009. He won a Second Runner up Award at a national woodcarving convention.
Eyes
One of the first things to learn when carving caricatures is to make sure that the eyes are realistic. A realistic-looking eye is fine, but a poorly executed caricature can leave viewers dissatisfied. You can use the following steps to ensure your eyes are symmetrical: Take a photo and trace the outline of the carving.
Next is to determine the eye shape. Some carvers use the identical eye shape to create their eyes. To create more realistic eyes, others use different shapes. Stop cuts are a way to create symmetrical eyes. Finally, you'll need to carve your pupil and iris. Now you are ready to start carving the caricature.
Safety
Wood carving caricatures are unique in their designs. These caricatures can tell a story with no words and are created by skilled artists who take great care to ensure accuracy. Caricatures often depict people or things in exaggerated ways to convey an impression. Dave Stetson is a woodcarver who has established rules to ensure safety and quality.
First, clean the wood thoroughly and remove pencil marks. You can clean the surface with water or dish soap. Use a 60-degree V-shaped tool to carve the head and neck. A 60 degree V-shaped tool, which cuts wood quickly, can be useful in carving. The Ramelson 60 degree V-shaped carver tool is a good choice. It is both sharp and simple to use.
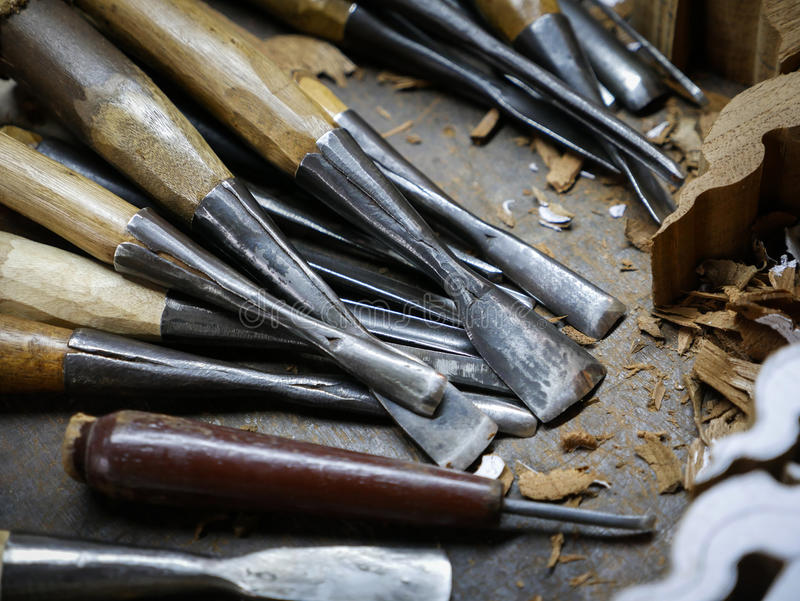
Materials
The wire and wood caricatures are a fun, challenging way to carve animal figures. While animal caricatures may not be as elaborate as human caricatures, they are still fun and can convey a story without the use of words. Caricatures often have exaggerated realism. While carving caricatures is a difficult hobby for beginners, it can be very rewarding for those who are more experienced.
A wood board and chisels are the two main materials that you need for carving. A hammer and chisels are also required. Acrylic white paint can be used as the base layer. It is available at craft stores. Once the base layer is complete, you can begin the second layer. This layer will consist of a golden brown paint and a few drops of burnt sienna (Academy). Use 2 drops of sunkissed pearl for the face.
FAQ
Do you know anything more about woodworking?
It is easy to underestimate the amount work involved with furniture construction. Finding the right kind of wood is the most difficult part. It can be hard to choose from the many types of wood that are available.
The problem with wood is that not all wood properties are the same. Some woods will warp over time, others will split or crack. These things should be considered before you buy wood.
What's the difference between a hobbyist and a professional woodworker?
Hobbyists enjoy making things out of wood, whereas professionals focus more on the quality of their work. Hobbyists tend to take pride and share their creations with family and friends. Professionals will spend hours researching designs and then begin to create a project. They will meticulously plan every detail of their work from choosing the right materials to finishing it.
How do I organize my shop?
Setting aside an area to store tools is the first step in keeping your workshop organized. Keep your tools away from dust and debris, so they stay sharp and ready to work. Use pegboard hooks to hang tools and accessories.
Statistics
- If your lumber isn't as dry as you would like when you purchase it (over 22% in Glen Huey's opinion…probably over 10-15% in my opinion), then it's a good idea to let it acclimate to your workshop for a couple of weeks. (woodandshop.com)
- In 2014, there were just over 237,000 jobs for all woodworkers, with other wood product manufacturing employing 23 percent; wood kitchen cabinets and countertop manufacturing employing 21 percent. (theartcareerproject.com)
- Overall employment of woodworkers is projected to grow 8 percent from 2020 to 2030, about as fast as the average for all occupations. (bls.gov)
- The best-paid 10 percent make $76,000, while the lowest-paid 10 percent make $34,000. (zippia.com)
External Links
How To
How to make wood joints
This tutorial will show you how to join two pieces of wood together. We will use the "pockethole joint," which means that we drill holes in the wooden pieces and then glue them together. If your wood is straight and flat, this method will work well. You may want to consider other methods, such as dowel joining. Here are the steps
-
Drill Pocket Hole Joints. Measure and mark the location where you would like to place the pocket hole joint. With a handheld drill machine or jig saw, drill 3/4-inch deep holes in the ends of each piece.
-
Sand Smooth. Sanding the wood's edges will ensure that the joint doesn't split.
-
Glue Together. Apply glue to both the ends of the wood. Allow it to sit for approximately 5 minutes before you clamp the pieces together.
-
Secure the pieces together. After the glue has dried completely, you can clamp the pieces together until they are flush.
-
Trim Joinery. Trim any excess wood surrounding the joint once the glue has dried completely.
Allow enough space between pieces so you can turn them inside out.