
If you are interested in trying your hand at woodcarving, there are several designs available to you. These patterns can be printed, making the entire process much easier. Beginning students can begin with geometric patterns. Once they are proficient at carving, they will be able to move on to more complex patterns such as flowers or animals. Here are some woodcarving examples. The following are some of the most useful patterns for woodcarving.
Fine Woodworking by Dremel.
If you're into crafting projects, you might want to try the Detailed Engraved Flower by Finewoodworking by Dremel. These rotary tools (often called Dremels) are great tools for engraving and detail. These tools are very easy to use. The speed dial can be set by simply pressing the button near the head. The speed dial can control the amount of material that the tool can remove from a wood surface when carving.
Detailed Engraved Flower by Frank C. Russell
The book "Detailed Engraved Flower by Frank C. Russell" is available in print and online. While Russell's early output wasn't entirely documentary, a lot of it was based upon first-hand observation. His later works, which combine secondhand information with fictionalization, are not strictly documentary. They are, rather, representations of a life that is part myth and part fact, with no definitive proof of the narrator.
One of his earliest works, "Detailed Engraved Flower By Frank C. Russell", is a clear example of the artist’s talent. This small piece is made from an ivory grip with a bull’s head. It dates back to 1911. The image is just a few millimeters long. The artist created this masterpiece as a tribute to his mother, who had died before him.
Tumbled Rose Detailed Engraved Flower
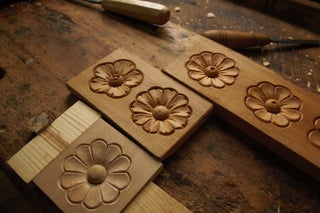
Tumbling Rose's detailed engraving of flowers is a lovely wood carving. The flower appears simple but actually contains intricate petals. It is an excellent project for novice carvers due to its intricate details. The stock photos only show a few pieces of the engraved flower, so you may find one or two that work out better than others. Tumbled Rose offers detailed engraved flowers in many sizes, including small and large.
FAQ
This is a job that I can make a living from.
Yes! Many woodworkers do. According to U.S. Bureau of Labor Statistics (BLS), woodworkers earned a median annual salary of $34,000 in May 2012. This is significantly higher than the national average, which is $31,000 per year.
How long does it usually take to complete a piece furniture?
It depends on the type and complexity of your design as well as the amount of finishing that you use. Hardwoods require more care than softwoods. Hardwoods tend to be more expensive that softwoods. But they last longer and resist moisture better. The process of finishing a piece of furniture typically takes anywhere from one week to three months.
How much do hobbyists need to invest in starting a business?
A lot of capital is required to purchase the necessary supplies and tools if you want to start your own woodworking shop. You can start by purchasing a small table saw and drill press as well as a circular saw, circular saw, jigsaw and sanding machines. These items won't break the budget and aren't expensive.
Statistics
- Average lumber prices rose about 600 percent between April 2020 and May 2021. (familyhandyman.com)
- Woodworkers on the lower end of that spectrum, the bottom 10% to be exact, make roughly $24,000 a year, while the top 10% makes $108,000. (zippia.com)
- The U.S. Bureau of Labor Statistics (BLS) estimates that the number of jobs for woodworkers will decline by 4% between 2019 and 2029. (indeed.com)
- If your lumber isn't as dry as you would like when you purchase it (over 22% in Glen Huey's opinion…probably over 10-15% in my opinion), then it's a good idea to let it acclimate to your workshop for a couple of weeks. (woodandshop.com)
External Links
How To
How to stain hardwood
Staining wood can be described as a process where chemicals are applied to the wood surface. This causes the wood to take on a new color. This chemical reaction causes the wood to change from white to brownish red. Oak is the most common wood type for staining. However, you can also use other wood types.
There are many options for applying stains to wood surfaces. Some methods include mixing the stain along with a solvent like turpentine and then applying the mixture to the wood by brushing or spraying. You can also apply a solution containing water and dye directly to the wooden surface. It is possible to mix stain into varnishes and paints, making it part of the finishing coat.
Preparing the surface is the most important step in staining wooden surfaces. The wood must be thoroughly cleaned to remove all grease and dirt. Sanding the wood smooths out rough spots and scratches. The next step is to determine the type of stain you would like to use. There are two basic kinds of stains: penetrating stains and non-penetrating stains. Penetrating colors penetrate deeper into wood than those that are non-penetrating. This makes them more suitable for darker colors, such as mahogany. Non-penetrating oils work best when used with light colors, like maple.
After you've decided what type of stain to apply, get ready for your tools. Paintbrushes are great for applying stain because they allow you to evenly spread the liquid across the surface. After you're done painting, make sure to have some rags handy to remove any excess stain. You should have enough containers to store the various components of the stain mixture if you intend to mix it yourself.
Once you have prepared your materials, start by cleaning the area where you plan to stain the wood. You can remove grime and dirt with warm water and soap. You can wipe down the entire furniture using a damp rag with clean water. If you intend to stain darker wood, make sure you get rid of any debris.
Apply the stain next. Apply the stain by brushing or spraying it onto one side of the furniture. Work slowly and carefully, moving back and forth along the grain of the wood until you reach the opposite end. Keep the stain from dripping off the wood's surface. Before you proceed with the next steps, let the stain dry completely.
Clear polyurethane is used to protect the painted surfaces. Three coats are recommended for polyurethane. Allow the third coat to dry overnight before sanding the final coat.