It is important to understand which woods are the best for your walking stick before you start carving it. Also, you will want to be familiar with the different techniques of whittling. David Allen used these techniques to carve his walking sticks. You can also find famous quotes about walking sticks, and how to carve them. These tips will help you make the perfect walking stick. Continue reading to find out more. You can now create a walking stick that is unique and functional!
Woods that can be used to carve a walking stick
The most difficult part of carving is finding a blank that is straight. It is possible to find branches from trees that are too bent for use. However, you need to continue looking until you locate a straight piece. When sap travels from the branches to the root, the winter months are the best time to harvest straight branches. This makes the wood more stable and less likely for splitting. However, if you can't wait until the spring to harvest the wood, it's fine to cut it while the tree is still green.
Several species of wood can be used for carving a walking stick. Chestnut is a sturdy wood from North America. Because it is dense, it can be used to make walking sticks and other similar tools. The wood grain in this species is often open or slightly closed. This wood grain makes a strong walking tool that is solid and smooth. It is also very attractive and is used extensively in carving. Some species can be carved without the bark.
Techniques for whittling a walking stick
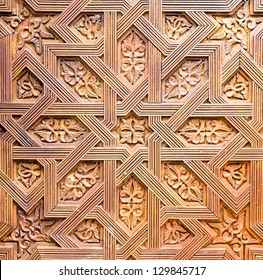
A few simple techniques are required to carve a walking sticks. First, pick a piece that has a unique texture. Some woods are unique in their bark colors and patterns, while others have natural swirls. These features can be enhanced with lacquer and paint. To make the shaft more appealing, you might also carve it. You should ensure that your stick is straight and free from branch shoots or tough spikes.
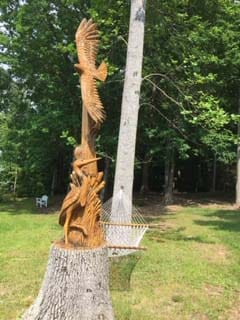
This book will teach you about different wood types and carving styles. The most common designs are snakes and lions. Not only can you carve snakes but fish, eagles, and even deer. Many people consider the talents of these artists divine. This is a book for the novice or the advanced carver.
David Allen uses these tools when carving a walkingstick
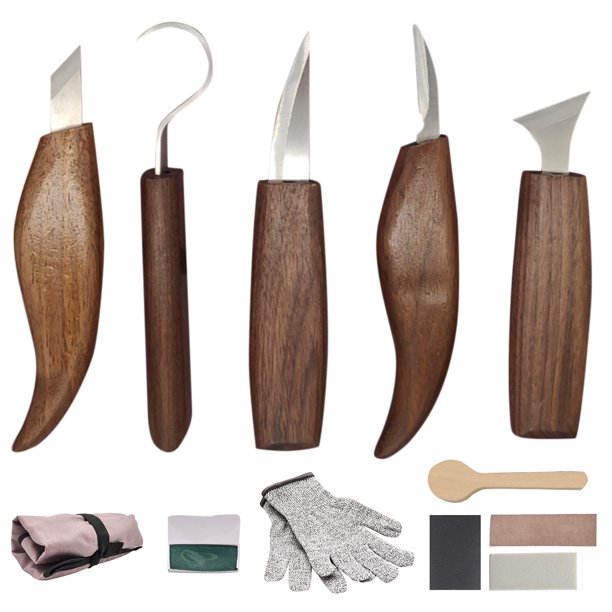
When David Allen was a young boy, he began making toys with a pocketknife he found under his house. Because he was too young for a knife to be used, he had the knife hidden from his family. His creations included toys like slingshots and utilitarian objects like shoeshine boxes. At the age of 15, Allen became disabled and began carving walking sticks. Allen used a pocketknife with chisel in order to carve the wood.
Allen developed his designs independently, digging around the roots of saplings and deciding on what to carve. He believed that a design had to "see" itself before it could be carved. This process was similar to that of many African-American artists. Allen often had visions or dreams about the design that he wanted. He was able create a stick which would invoke the emotions and feelings in his community.
Famous quotes regarding carving a walking stick
Carving a walking stick requires complex skills and a solid blank. The most difficult part is to find a straight blank. While there are many places to source your stick from, it's important that you persevere until you find one that is straight. You may find it bent beyond practical use. Keep searching until you find it. It is best to cut your stick during winter sap flow from the tree's branches down to the root. The sap makes the wood softer and less likely split.
The wood's texture, color and grain are important considerations when selecting wood. Each piece of wood has its own unique texture and color, and may have unique swirls or bark marks. The lacquer will make these natural swirls even more beautiful. A smooth finish is possible by choosing a wood shaft that is free from branch shoots and tough spikes. This will make the entire process easier. Regardless of what material you choose, you should carefully consider the type of finishing you'll use.
FAQ
How long does a piece take to finish?
It depends on the type of wood you choose, the complexity of the design, and the amount of finishing you apply. Hardwoods, on the other hand, are more durable than softwoods. Hardwoods also tend to be more expensive than softwoods. They last longer and are more resistant to moisture. The typical time taken to finish a piece furniture takes anywhere from one to three month.
How do you calculate woodworking costs?
When calculating the costs of any project, it is important to keep them as low and affordable as possible. You should always try to make sure that you are getting the best deal on materials. You should also consider other factors that could impact the cost of your project, such as experience, skill level, time, and money. Our guide to the average household DIY task price will give you an idea of how much it costs to complete different types of woodwork projects.
Can I refinish furniture that I make?
Yes! You don't have to hire a professional to refinish furniture. There are many ways you can do it yourself. Here are a few ideas:
Use sandpaper for removing stains and scratches. After that, use a clean towel to wipe the surface.
Apply clear polyurethane varnish. Allow furniture to dry completely before you move it around.
Paint furniture with acrylic paint.
Use stain instead of paint. You can give your furniture a rich appearance with stain.
Use shellac wax. You can protect your wood with wax and give it shine.
How do I get started as a woodworker?
Woodworking is an art. It requires patience. It takes time for you to master the different techniques and tools that are required to woodwork.
There are many types of woodworking equipment on the market today. Some prefer to use power tools, while others prefer to use hand tools.
Your choice, however, is up to you. However, you need to ensure that the tool you use is the right one for the job. You might start with a simple set of tools if you don't have much experience.
You could also try learning how to use a router which is used to cut intricate shapes into wood. These can be found at most hardware shops.
Are there any tips for starting a woodworking enterprise?
It can be difficult to start a woodworking shop. It's worth it if you're passionate and willing to work hard. You'll enjoy the challenge and rewards of owning your own business.
You should remember that unexpected issues may occur when you launch a new venture. You might run out money, or you may have to borrow unexpectedly. Maybe customers won't be willing to pay what you want. You need to be ready for these situations if you want to survive.
It is a good idea to create a separate bank account just for your company. You'll know exactly how much money is coming in by setting up a separate bank account.
Are there any other things I should know regarding woodworking?
It is easy to underestimate how much work it takes to make furniture. Finding the right wood for the project is the hardest part. It is difficult to choose between the various types of wood.
Another issue is that wood does not have the same properties. Some woods will crack or warp with time. Others will split or crack. Before purchasing wood, you should consider these factors.
How do I organize my shop?
A designated place to store your tools is the first step towards keeping your workshop clean. Make sure your tools are clean and free of debris and dust so they can be used properly. You can hang tools and accessories with pegboard hooks.
Statistics
- Overall employment of woodworkers is projected to grow 8 percent from 2020 to 2030, about as fast as the average for all occupations. (bls.gov)
- The U.S. Bureau of Labor Statistics (BLS) estimates that the number of jobs for woodworkers will decline by 4% between 2019 and 2029. (indeed.com)
- Most woodworkers agree that lumber moisture needs to be under 10% for building furniture. (woodandshop.com)
- If your lumber isn't as dry as you would like when you purchase it (over 22% in Glen Huey's opinion…probably over 10-15% in my opinion), then it's a good idea to let it acclimate to your workshop for a couple of weeks. (woodandshop.com)
External Links
How To
How to stain wood
Staining wood can be described as a process where chemicals are applied to the wood surface. This causes the wood to take on a new color. This chemical reaction causes the wood color to change from white and brownish red. The most common type of wood used for staining is oak, although many other types of wood can be stained.
You can apply wood stains in many different ways. Mixing the stain in a solvent such as turpentine and spraying it onto the wood is one method. Another method involves applying a solution of water to the wood. The stain can be mixed with paints and varnishes to become part of the final coating.
Preparing the surface is the most important step in staining wooden surfaces. Cleaning the wood thoroughly removes any dirt or grease that could interfere with applying the stain. Sanding smoothens scratches and rough spots. You must then decide on the type of stain that you wish to use. There are two main kinds of stains available: non-penetrating stains and penetrating. Penetrating stain penetrates deeper into wood than nonpenetrating, making them suitable for dark colors like mahogany. Non-penetrating oils work best when used with light colors, like maple.
After deciding on the type of stain, you want to apply, prepare your tools. Paintbrushes are great for applying stain because they allow you to evenly spread the liquid across the surface. It is a good idea to have rags on hand in case you need them to clean up any stains that may remain after you have finished painting. If you plan on mixing the stain yourself make sure that you have enough containers to hold the different components.
After you have prepared your materials, clean the area you intend to stain. Use warm water and soap to clean away dirt and dust. Use a dampened sponge and warm water to clean the entire piece. Make sure you eliminate any loose debris, especially if you plan to stain darker wood.
The stain should be applied next. Next, apply the stain to the furniture by starting at one end. Slowly and carefully move along the grain of wood, slowly but steadily, until you reach the other end. Keep the stain from dripping off the wood's surface. Before you proceed with the next steps, let the stain dry completely.
Protect the painted surface with a coat polyurethane paint sealant. Apply three coats polyurethane sealer. Allow the third coat of polyurethane sealer to dry overnight before applying the final coat.