Chip carving is a difficult task if you have ever tried it. There are many styles and techniques you can use, but which one is the best? What tools will you need? This article will share my tricks and tips for carving chips and help you choose the right one for you. There are many key ingredients to successful chip carving, no matter how traditional your style.
Traditional
Chip carving is one of the oldest forms of decorative woodcarving. You will need a straight-edged blade knife, but you can also use a skew-ground and offset knife. Chip carving involves making small triangular cuts in wood to create patterns. This art form began over 1,000 years ago and evolved simultaneously in many different lands. Due to its popularity, many of the designs were so similar across cultures that it was hard to distinguish one from the other.
As the practice spread throughout the world, the skills required to carve wood were passed down from generation to generation. In Sweden, chip carving was a common way to decorate furniture and eventually schools were established to teach the art. Modern chip carvers are able to benefit from the centuries-old skills and knowledge of carvers. Through generations, the knowledge and experience of carvers was passed on from apprentice to student. It is a long-lasting process that continues today.
No cost for form
If you've always wanted to try chip carving, you've come to the right place. Murray Taylor's DVD shows you how to make freeform and geometric carvings. It's a good introductory project and contains lots of useful information. NTSC and English formats are available. You can also purchase the DVD in stereo and widescreen. Artisan Media Ltd. holds the DVD. It can also be downloaded in MP4 format to Windows and Mac computers.
Geometric chip carving is based on lines, circles, triangles and circles. This technique can be combined with different styles and shapes to create endless possibilities. This type of chip carving is also known as free-form chip carving. Your chips can be any shape you like, from a flower to a dragon. A free-form method of chip carving is a great way to incorporate several different techniques into one piece.
Techniques
Chip carving has been around since the beginning of time. Many countries have examples of chip carving. In the South Pacific Islands, for example, chip carving has been found on boat paddles and ceremonial tool handles. Most likely, these carvings were made with pieces of bone and shells. However, some people report using shark teeth. This book shows how to create stunning designs using a variety chip carving techniques.
Chip carving is easy if you know how to follow a few simple techniques. This includes learning how to carve the fine triangle. This pattern is easy and straightforward to understand. Simply carve several triangles and continue this process until you have carved the pattern. But this doesn't mean you have to carve boring patterns. By changing the triangles, it is possible to create many different patterns.
Tools
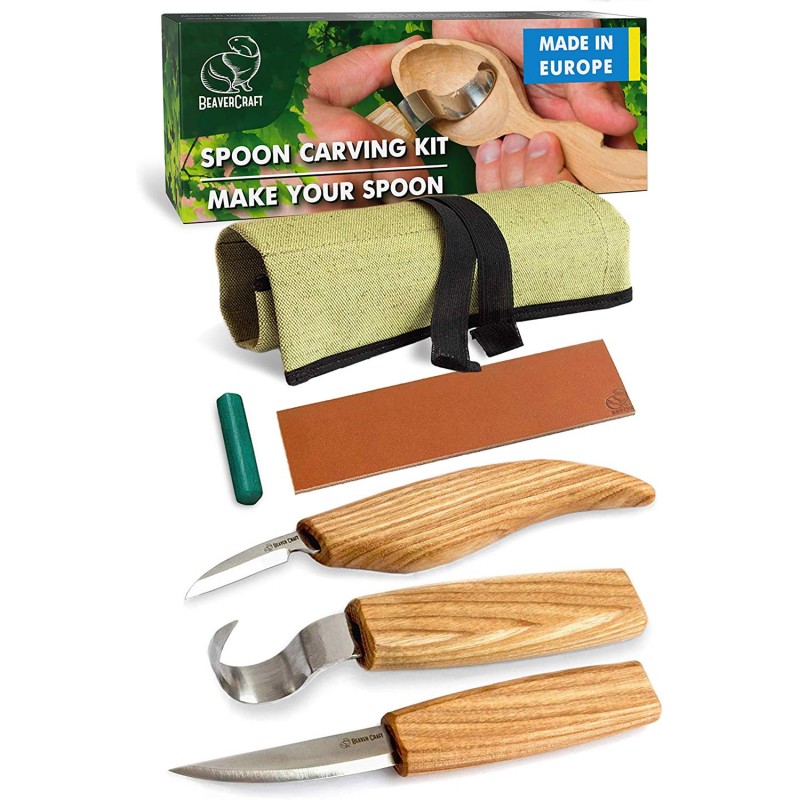
Lora Irish offers an online seminar for free that will cover the basics of chip-carving. You will learn how to use various tools and supplies for carving, such as a chip knife and stab knife. Irish will also be demonstrating the different types and uses of wood carving tools. Choose from the below list to find the right tool that suits your needs. These tools can be used for creating simple shapes and designs or to make intricate designs.
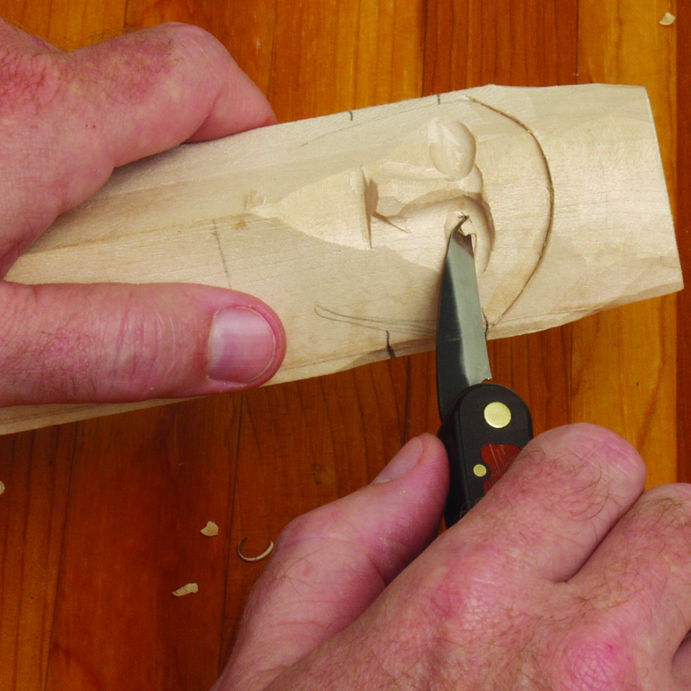
A chip carving knife employs special geometry. It is approximately 1 1/2 inches long with a narrow back edge. This allows you to make precise incisions. You should also choose a point that is sharp and needle-sharp so that the edges meet perfectly. The chip carving knives are made from stainless steel with a sharp tip. A chip carving knife should not be too sharp to cut a single piece of wood.
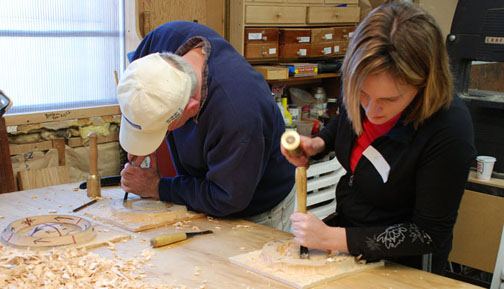
Getting started
When getting started with chip carving, you must first learn about its methodology. The method you choose will depend on the type and purpose of your carving. However, these principles will help you ensure your work is accurate. Chip carving is the art of cutting fine patterns in wood. To create your first chip carving, follow these steps:
It is very important to sharpen a chip carving knife. A chip carving knife's blade will have bevels at each end. This indicates that it is primary. The sharpening tool is shaped like a small diamond and can produce sharp edges. Place it at a 10 degree angle. The stone will simultaneously sharpen both the chip carving knife & chip carving tool.
FAQ
How can I keep my shop organised?
To keep your workshop tidy and organized, you should first create a place for tools storage. Your tools will stay sharp and ready to go when they are free from dust and debris. Hang tools and accessories using pegboard hooks.
How long does a piece take to finish?
It depends on the type and complexity of your design as well as the amount of finishing that you use. Hardwoods are more difficult to maintain than softwoods. Hardwoods are also more expensive than softwoods. However, they are stronger and more resistant to moisture. It takes between one and three months to finish a piece.
What material would your recommendation be to learn woodworking?
Start with softwoods such as pine and poplar. These two are the easiest to master, then you can transition to hardwood.
Statistics
- The best-paid 10 percent make $76,000, while the lowest-paid 10 percent make $34,000. (zippia.com)
- In 2014, there were just over 237,000 jobs for all woodworkers, with other wood product manufacturing employing 23 percent; wood kitchen cabinets and countertop manufacturing employing 21 percent. (theartcareerproject.com)
- Woodworkers on the lower end of that spectrum, the bottom 10% to be exact, make roughly $24,000 a year, while the top 10% makes $108,000. (zippia.com)
- The U.S. Bureau of Labor Statistics (BLS) estimates that the number of jobs for woodworkers will decline by 4% between 2019 and 2029. (indeed.com)
External Links
How To
How to make wood joints
This tutorial will teach you how to join two pieces wood together. We will be using the "pocket-hole joint", which involves drilling holes in wood and then gluing them together. If your wood has a straight grain, smooth surface, you can use this method. Try dowel joinery instead if your wood doesn't look straight. Here are the steps
-
Drill Pocket Hole Joints. Measure and mark the location where you would like to place the pocket hole joint. Next, drill 3/4 inch holes in each end of each piece using a handheld drilling machine or jigsaw.
-
Sand Smooth. Sanding the edges of the wood will help to prevent the joint from splitting later.
-
Glue together. Apply glue on both sides of the wooden plank. Allow the wood to rest for five minutes before clamping it together.
-
Fix the Pieces together. After the glue has dried you can attach the pieces to form a flush joint.
-
Trim Joinery. After the glue dries completely, trim off any excess wood around the joint.
You should leave enough space between the pieces to allow you to turn them inside-out.