A beginner woodcarver might not know where to begin. Here are some tips and tricks to help you get started with your first animal carving job.
Dog
You can find many free patterns online for woodcarving dogs if you're an amateur. These patterns will guide your carving of your dog in a variety styles and dimensions. These are some of the tools needed to carve your canine friend. You'll need a bandsaw or coping saw, chisels (or a mallet), and time to sharpen. Once you have these tools, you can start carving.
Eagle
Native Americans have long held the bald Eagle as a symbol for strength, courage, and knowledge. It was about 20 inches across by five inches wide. The eagle today is a popular choice in wood carvings. There are many options for carving eagles from antique to modern woods. This article will focus on some of the most popular wood carving styles.
Bear
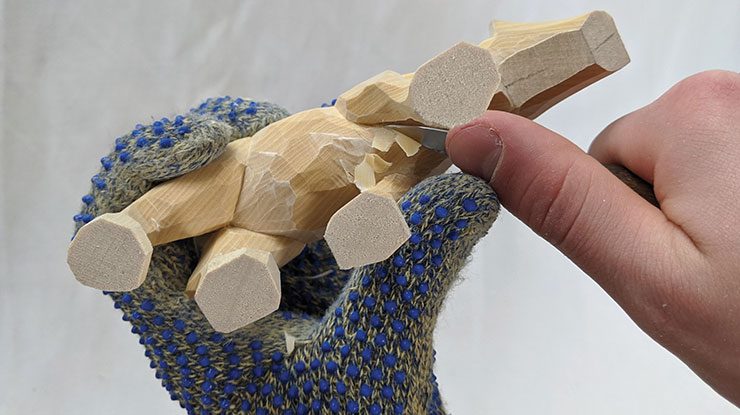
Carving a bear from wood is a relatively straightforward project, and it has a few distinguishing lines and shapes. Each line is heavier than the previous. For more visual interest, bears have their front paws angled in opposition to the leg lines. You might consider buying a book that will teach you how to make a bear. James Miller's book describes the entire process.
Elephant
A wood elephant carving can add a unique touch to your home. 1stDibs has 56 antique carved wooden elephants and two modern pieces. These pieces were made as early as the 19th-century and have grown in popularity over recent years. You have the option to choose from Art Deco or Mid-Century Modern styles. Or, you can pick a smaller piece that will add a subtle touch of elegance to your home.
Moose
A moose is a wonderful animal to wood carve, whether you are looking to add antlers and/or create a stunning moose head. Moose antlers and paddles attach to dowels. Then push them in or glue them. The moose can be painted with a walnut gel stain and/or colored with paint.
Template for Moose
A template for carving moose helps carvers create realistic-looking carvings. Moose carvings are easy to paint and stain with walnut gel stain. After learning the basics of carving this animal, it's not difficult. You can add details like fur or eyes with a brush, or a typhoon piece on a diegrinder. The Moose template is ideal for beginner wood carvers who want to carve an animal.
Bear template
To begin a bear wood carving, you'll need a template. To explore the wood's features, you can use a Dremel to create a template. You can also use this tool to make stop cuts to separate legs and lower bodies. To mark the location of splits, you can also make small V cuts in the legs. Round the underbelly once you've completed the leg and ear pieces. For the bear's final shape, you will need to leave some space at its back.
Eagle template
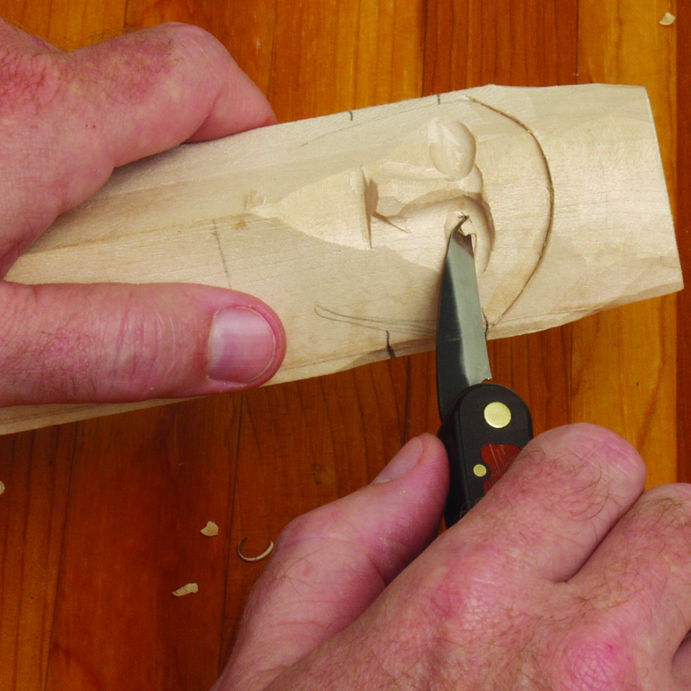
Three detailed templates are needed to carve an adult eagle. One of them is for the actual carving, the other will serve as your working paper template and will be cut off to transfer patterns. The third template is for reference. Then you will need to use the templates as a reference. Be sure to cut the lines as close as possible with the pattern line. Make sure you align all marks.
Mouse template
You'll be surprised at the variety of designs you have to choose from if you're just starting wood carving. This will make the task easier. There are printable patterns that can help you. A simple geometric pattern is a good starting point if you're just beginning. You can then move on to more complex patterns as you learn. Once you have mastered the basics you will be able to create the perfect mouse.
FAQ
Are there any other things I should know regarding woodworking?
It is easy for people to overlook the work involved in furniture making. Finding the right kind of wood is the most difficult part. There are so many varieties of wood available that choosing one can be difficult.
A problem is that wood doesn't have the same properties. Wooden can split or crack, while some woods may warp. These are important considerations to make before you purchase wood.
Do I have to refinish my furniture?
Yes! You don't have to hire a professional to refinish furniture. There are many ways you can do it yourself. Here are some examples:
Sandpaper can be used to remove stains and scratches. Next, wipe the surface clean with a damp cloth.
Apply clear polyurethane varnish. Before moving furniture, let dry completely.
Acrylic paint can be used to paint furniture.
Use stain instead of paint. The furniture will have a rich look thanks to the stain.
Shellac wax can be applied. Wax will protect the wood and add shine.
What kind of tools are used to carpenters?
The most common tool used by carpenters is a hammer. A hammer is used for pounding nails into wood. It also helps them hold pieces together while they are working on a project. Other tools include clamps.
Is there a way to start my own woodworking company?
It is difficult to start your own woodworking company. There are many regulations and legal requirements that you will need to comply with. But, this doesn't mean you need to go through all of the trouble of setting up your business. Many people choose to join existing businesses. You only need to pay membership and tax fees.
Do you have the skills to learn woodworking?
Learning by doing is the best way of learning anything. Woodworking is an intricate art form that requires practice, skill, patience, and experience. To master any craft, it takes time.
It is the best way to learn to do something is to actually do it. Start small, and work your way up from there.
What is the minimum investment a hobbyist needs to make in order to get started?
A lot of capital is required to purchase the necessary supplies and tools if you want to start your own woodworking shop. A good place to start would be by buying a small table saw, drill press, circular saw, jigsaw, and sanding machine. These items aren’t too expensive so you won’t have to break the bank.
What is the difference between a hobbyist or a professional woodworker, and how can you tell?
Hobbyists enjoy creating things out of wood. Professionals tend to focus on the quality. Hobbyists take great pride in their creations, and share them with family and friends. Professionals will spend hours researching designs and then begin to create a project. Professionals will be meticulous about all aspects of their work, from selecting the right materials to finishing it.
Statistics
- The U.S. Bureau of Labor Statistics (BLS) estimates that the number of jobs for woodworkers will decline by 4% between 2019 and 2029. (indeed.com)
- If your lumber isn't as dry as you would like when you purchase it (over 22% in Glen Huey's opinion…probably over 10-15% in my opinion), then it's a good idea to let it acclimate to your workshop for a couple of weeks. (woodandshop.com)
- Overall employment of woodworkers is projected to grow 8 percent from 2020 to 2030, about as fast as the average for all occupations. (bls.gov)
- Woodworkers on the lower end of that spectrum, the bottom 10% to be exact, make roughly $24,000 a year, while the top 10% makes $108,000. (zippia.com)
External Links
How To
How to make wood joints
This tutorial will demonstrate how to join two pieces together of wood. The "pocket hole joint" is a method whereby we drill holes into the wood and glue them together. This works well if the wood is straight and smooth. You might consider dowel joinery if your wood isn’t straight or flat. Here are the steps
-
Drill Pocket Hole Joints. Measure and mark the location where you would like to place the pocket hole joint. With a handheld drill machine or jig saw, drill 3/4-inch deep holes in the ends of each piece.
-
Sand Smooth. Sanding the edges of the wood will help to prevent the joint from splitting later.
-
Glue both sides together. Apply glue to both ends of the wood. Let it sit for about 5 minutes before clamping the pieces together.
-
Clamp the Pieces Together. After the glue has dried thoroughly, secure the pieces so that they are flush.
-
Trim Joinery. Trim any excess wood surrounding the joint once the glue has dried completely.
Make sure to leave enough room between the pieces so that you can turn them inside and out.