A photo trail is a great way to start carving your own eyes if you've ever wanted to. This is a great way of replicating a famous carver without spending time researching each style. This will allow you to have as much fun as possible while achieving realistic results. However, if you've never been a talented carver, don't worry. There are many simple ways to have realistic-looking eyes.
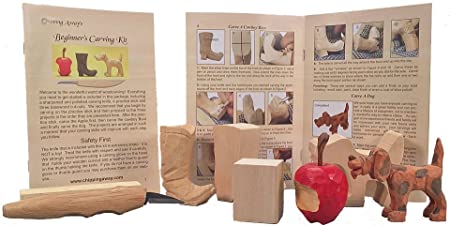
Lesson 4: Carving hair
This tutorial will guide you through the steps of carving a flowing hairstyle on your animal carving. It will help create a realistic appearance that evokes lifelike emotions. The video will show you how to create different textures and styles of hair. To create different levels of hair, you can also learn how to use curved tools. Once you've mastered the basics of hair cutting, you can move on to more difficult parts like the eyeballs or nose.
First, you should outline the eye cavities with a pencil. Next, draw a straightline that runs from the eyebrows towards your eyelids. You can also use a pencil to draw small squiggles to make the forehead higher and rounder. Afterward, use a whittling sloyd knife to round the corners of the cheeks and bottom lip, as well as the beard area.
Lesson 5: Carving crow's feet
Crow's feet is a common condition. You should learn what causes it. These wrinkles are the result of repeated facial expressions, such as squinting. If you have crow's foot, you can use reading glasses, or get sunglasses. For crow’s feet prevention, you can use facial moisturizers.
The appearance of wrinkles and fine lines on the face can make someone look older than their years. Thankfully, you can easily remove these lines to reveal a younger-looking complexion. Here are some helpful tips:
Lesson 6: Carving an iris
Children can observe the iris or ocellus through a mirror and see how they feel. They can draw their eyes themselves using observational drawing and the mirror. They can use observational drawing and mirrors to find different shades of white in the iris or black in central. Once they are done drawing, they can use different media to add colour and create an illusion of depth. Children can then look at each other's drawings of eyes and compare how they differ in colour.
FAQ
Where can I buy hardwood lumber?
Home Depot has hardwood lumber for sale. You can find all types of wood products at Home Depot, such as flooring, cabinets and furniture.
You can also find a large selection of engineered hardwoods like Ipe (Araucaria Angustifolia), Brazilian Cherry, and Mahogany in their collection (Swietenia Macedonilla).
These woods are available online by searching Google for "hardwood lumber".
What is the difference in a hobbyist and professional woodworker?
Hobbyists enjoy making things out of wood, whereas professionals focus more on the quality of their work. Hobbyists take great pride in their creations, and share them with family and friends. Professionals will spend hours researching designs and then begin to create a project. Professionals will be meticulous about all aspects of their work, from selecting the right materials to finishing it.
How often should I get new supplies?
You'll probably have to replace some of your tools over time. Sharpening hand tools is a must. If you are using power tools, you will need to purchase replacement parts regularly. Avoid buying too many products at once. Spread your purchases out over several months.
Statistics
- The U.S. Bureau of Labor Statistics (BLS) estimates that the number of jobs for woodworkers will decline by 4% between 2019 and 2029. (indeed.com)
- In 2014, there were just over 237,000 jobs for all woodworkers, with other wood product manufacturing employing 23 percent; wood kitchen cabinets and countertop manufacturing employing 21 percent. (theartcareerproject.com)
- Overall employment of woodworkers is projected to grow 8 percent from 2020 to 2030, about as fast as the average for all occupations. (bls.gov)
- Most woodworkers agree that lumber moisture needs to be under 10% for building furniture. (woodandshop.com)
External Links
How To
Here are some tips on how to drive nails in wood
It is essential to pick the right size and style of hammer before you can drive a nail in wood. The most common types of hammers are claw hammers, sledgehammers, mallets, ball peen hammers, and hatchets. Each type of hammer comes with its advantages and disadvantages. For example, a claw hammer works best when you want to hit something hard, like nails; however, it's difficult to control precisely where the blow lands. A sledgehammer is great for hitting large areas at once, but it's too heavy to use effectively for smaller tasks.
After you've chosen the right tool, hold your hand flat to the handle so it rests comfortably in one of your palms. You can grip the handle with your fingers, but not so tight that it causes injury. The hammer should be held straight up with your wrist relaxed. You should then swing the hammer straight up, keeping your wrist relaxed. You should feel the impact from the hammer striking a nail. Practice swinging your hammer on a block of wooden until you feel comfortable.
Once you are ready to drive the nail, place the hammer close to your body. The nail should be perpendicular to wood's surface. Your eyes should be focused on the nail's tip. Swing your hammer forward. Then follow through with the motions of the hammerhead. Continue this motion several times, slowly increasing the speed of each swing. Try adding power to your swings when you've mastered the technique. Try holding the hammer above your shoulder and bring it down forcefully. This way, you'll be able to put more energy behind your blows.
Once you've made the first nail hole, take out the hammer. To remove the remainder of the nails, you can use a screwdriver/pry bar. To avoid splitting the wood, make sure the nail heads are not touching the board's surface.